Zooming at the University of Memphis
How to use Zoom for live lectures and record it
What do you need?
A computer with a monitor. Chromebook is good enough. I have tested this stuff on Mac, Windows, Linux, Chromebook.
A good web camera with good microphone. Logitech 920 or 615 are good. The 615 has been on sale at Best Buy for $36, but it seems to be out of stock in stores.
A browser, such as Chrome, Brave, Firefox, Safari, etc. Zoom runs as a browser application, and not as a separate program, though that's also a possibility.
Outline of what needs to be done
Since not all students may view your live lecture, because of lack of Internet access at home, you need to record it. Correspondingly, there are two main steps you will take:
Give and record your lecture using Zoom.
Upload the file, containing the recording, to Onedrive, so that students can view the lecture.
Testing Zoom: Hosting a meeting
After making sure that your camera is attached to the computer via a USB cable, you start Zoom by going to
and select Sign in.
You will have to log in with your usual UofM credentials. Here is what I see after logging in
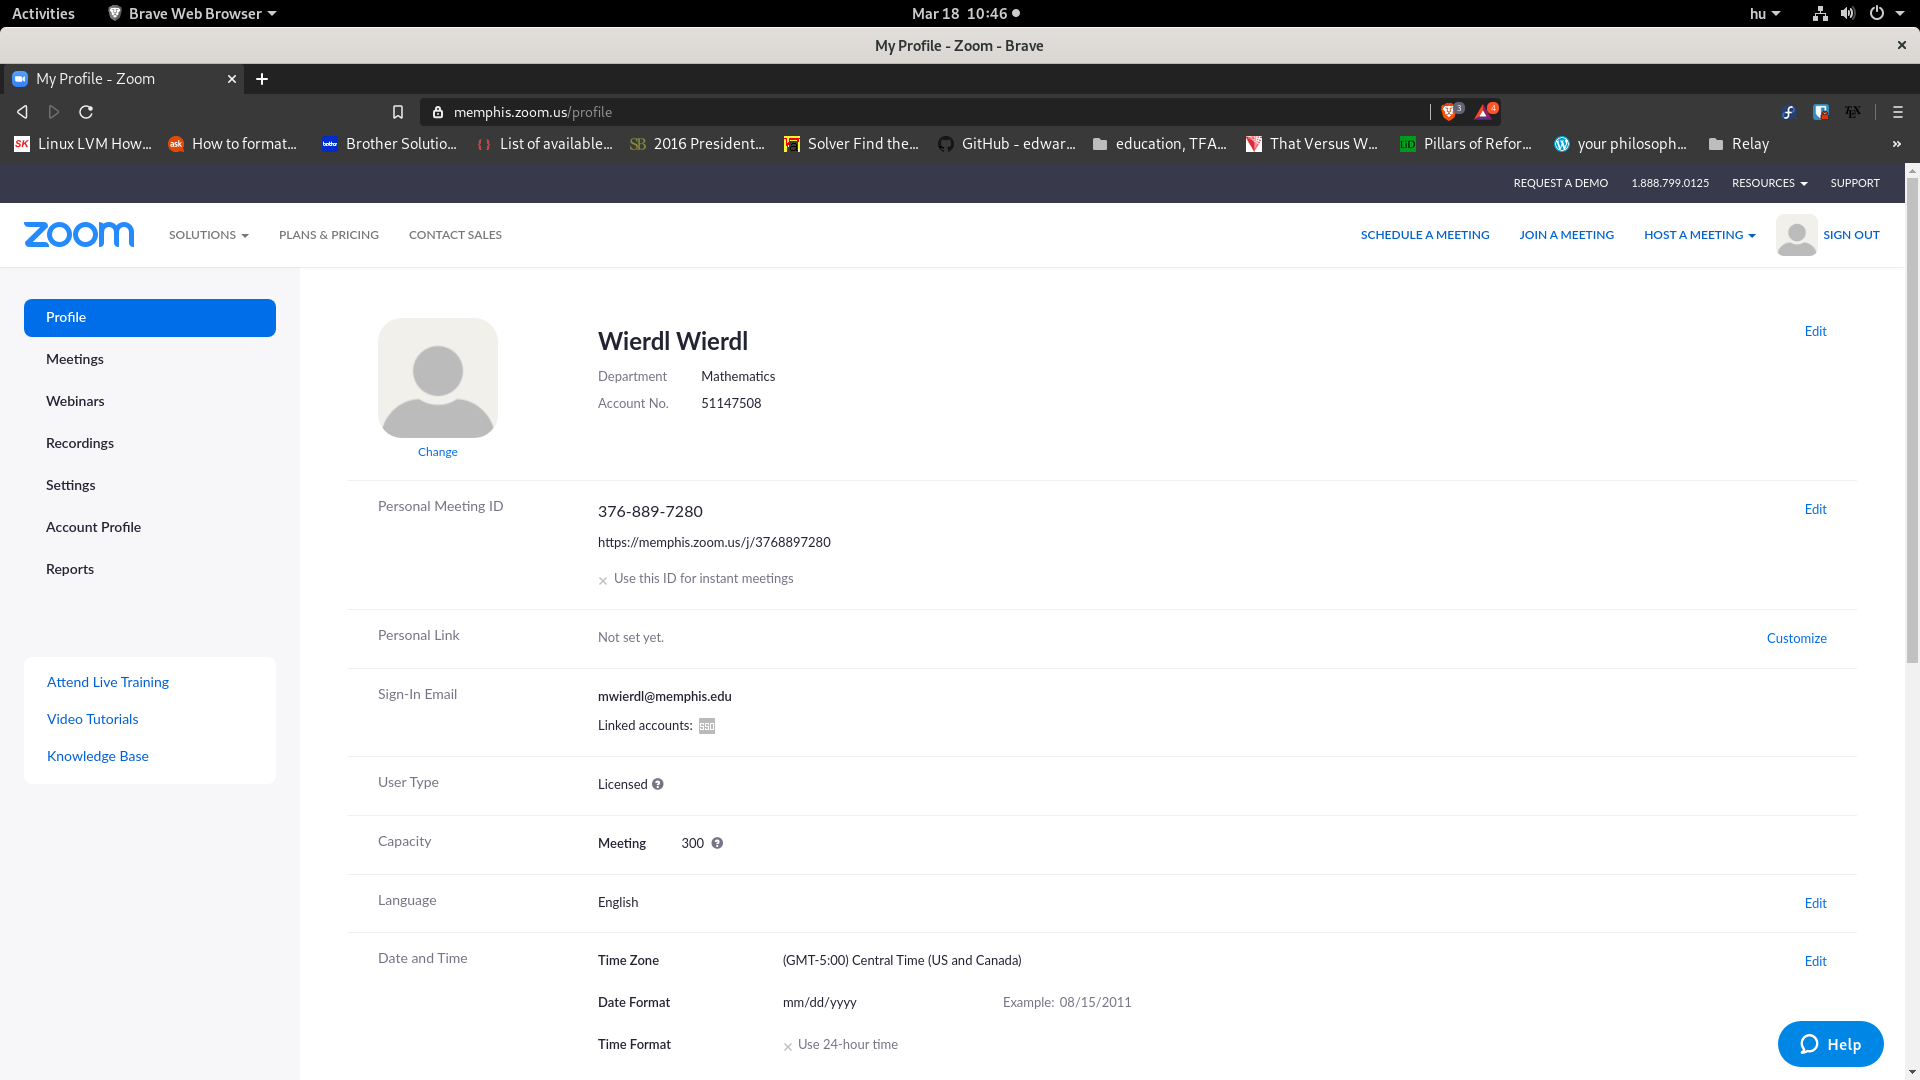
Lots of configuration stuff there, and you can indulge yourself with things like synchronizing with Google Calendar, but please resist for now. Instead, select HOST A MEETING in the upper right part of the browser screen. You will have three options to choose from, select With Video On. You'll see something like this
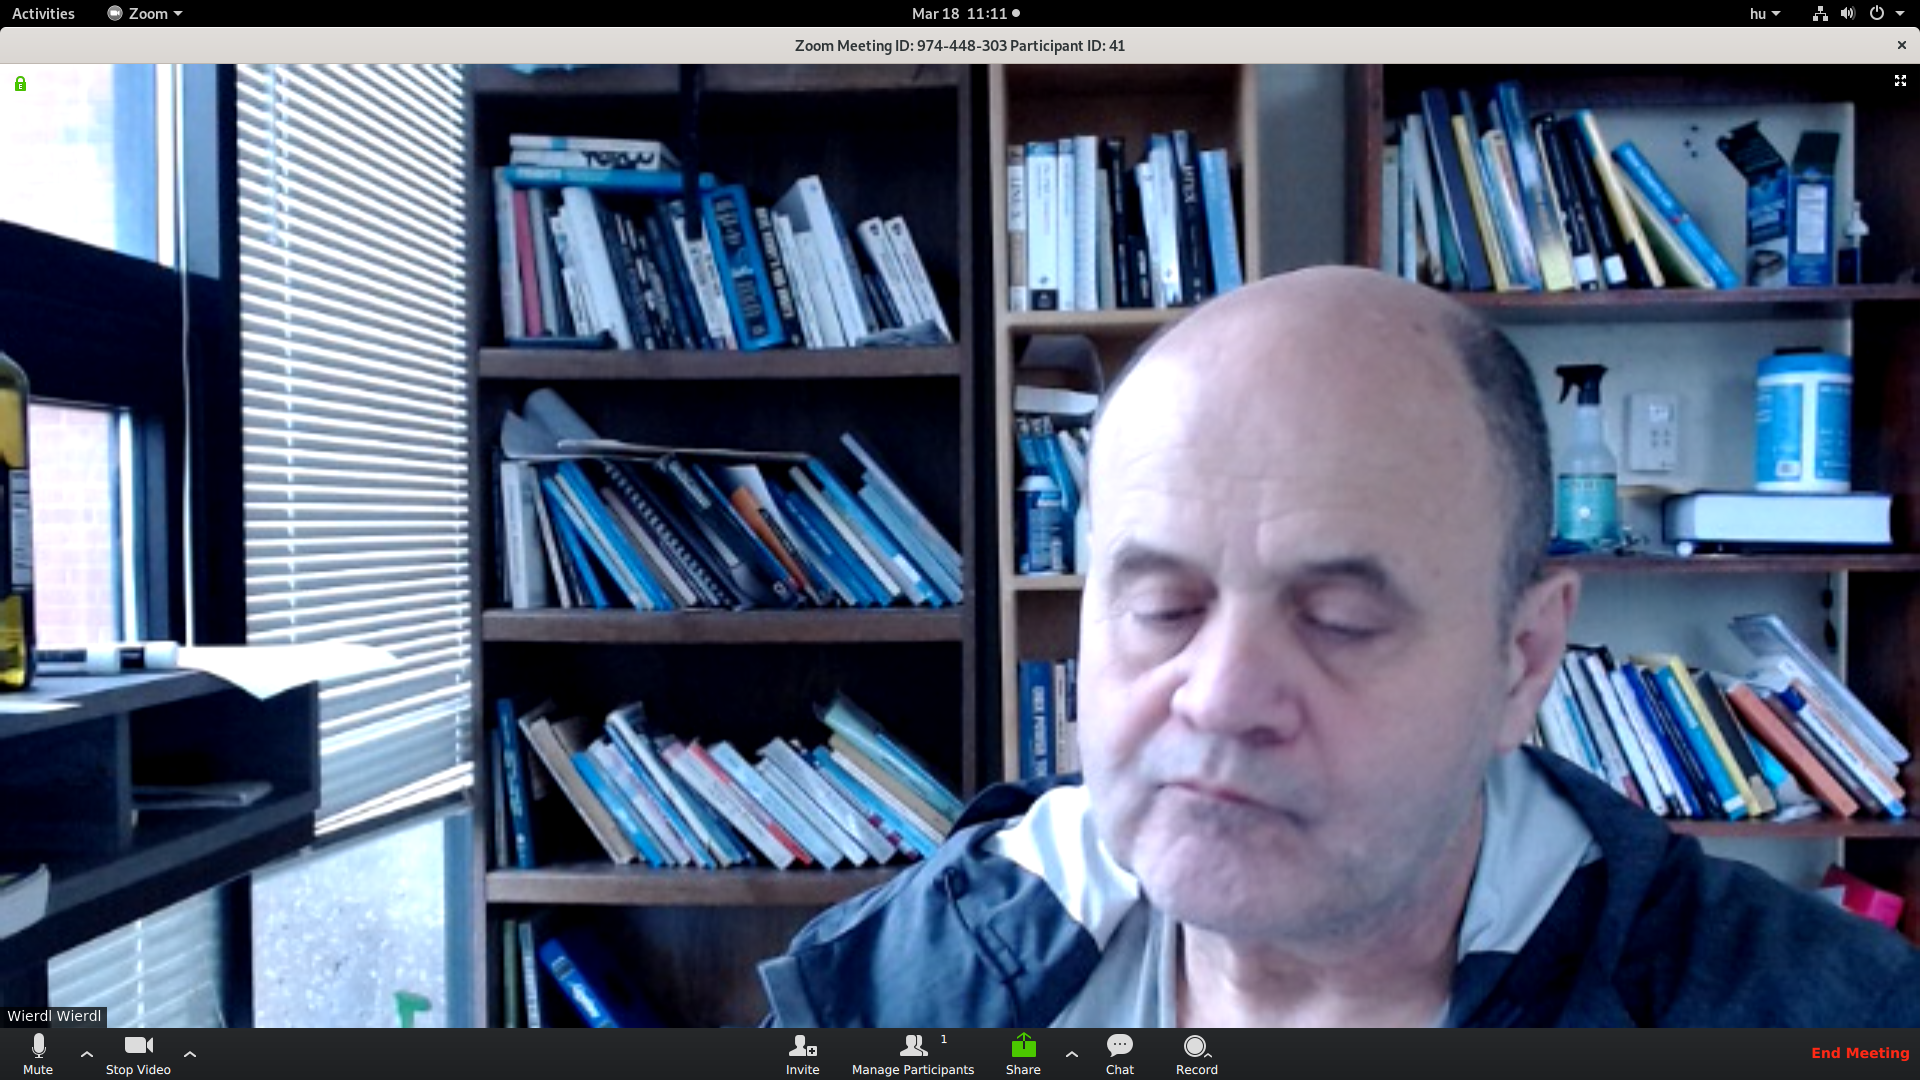
In the lower left corner, you see the icons of a microphone and a video camera, and on the right of each there are up arrows. Clicking on them, allows you to configure the settings of these devices. Besides making sure that the correct device is used (for example, the Logitech 920S camera and its microphone), there are two settings for the camera which are crucial. After selecting Video Settings... you will see
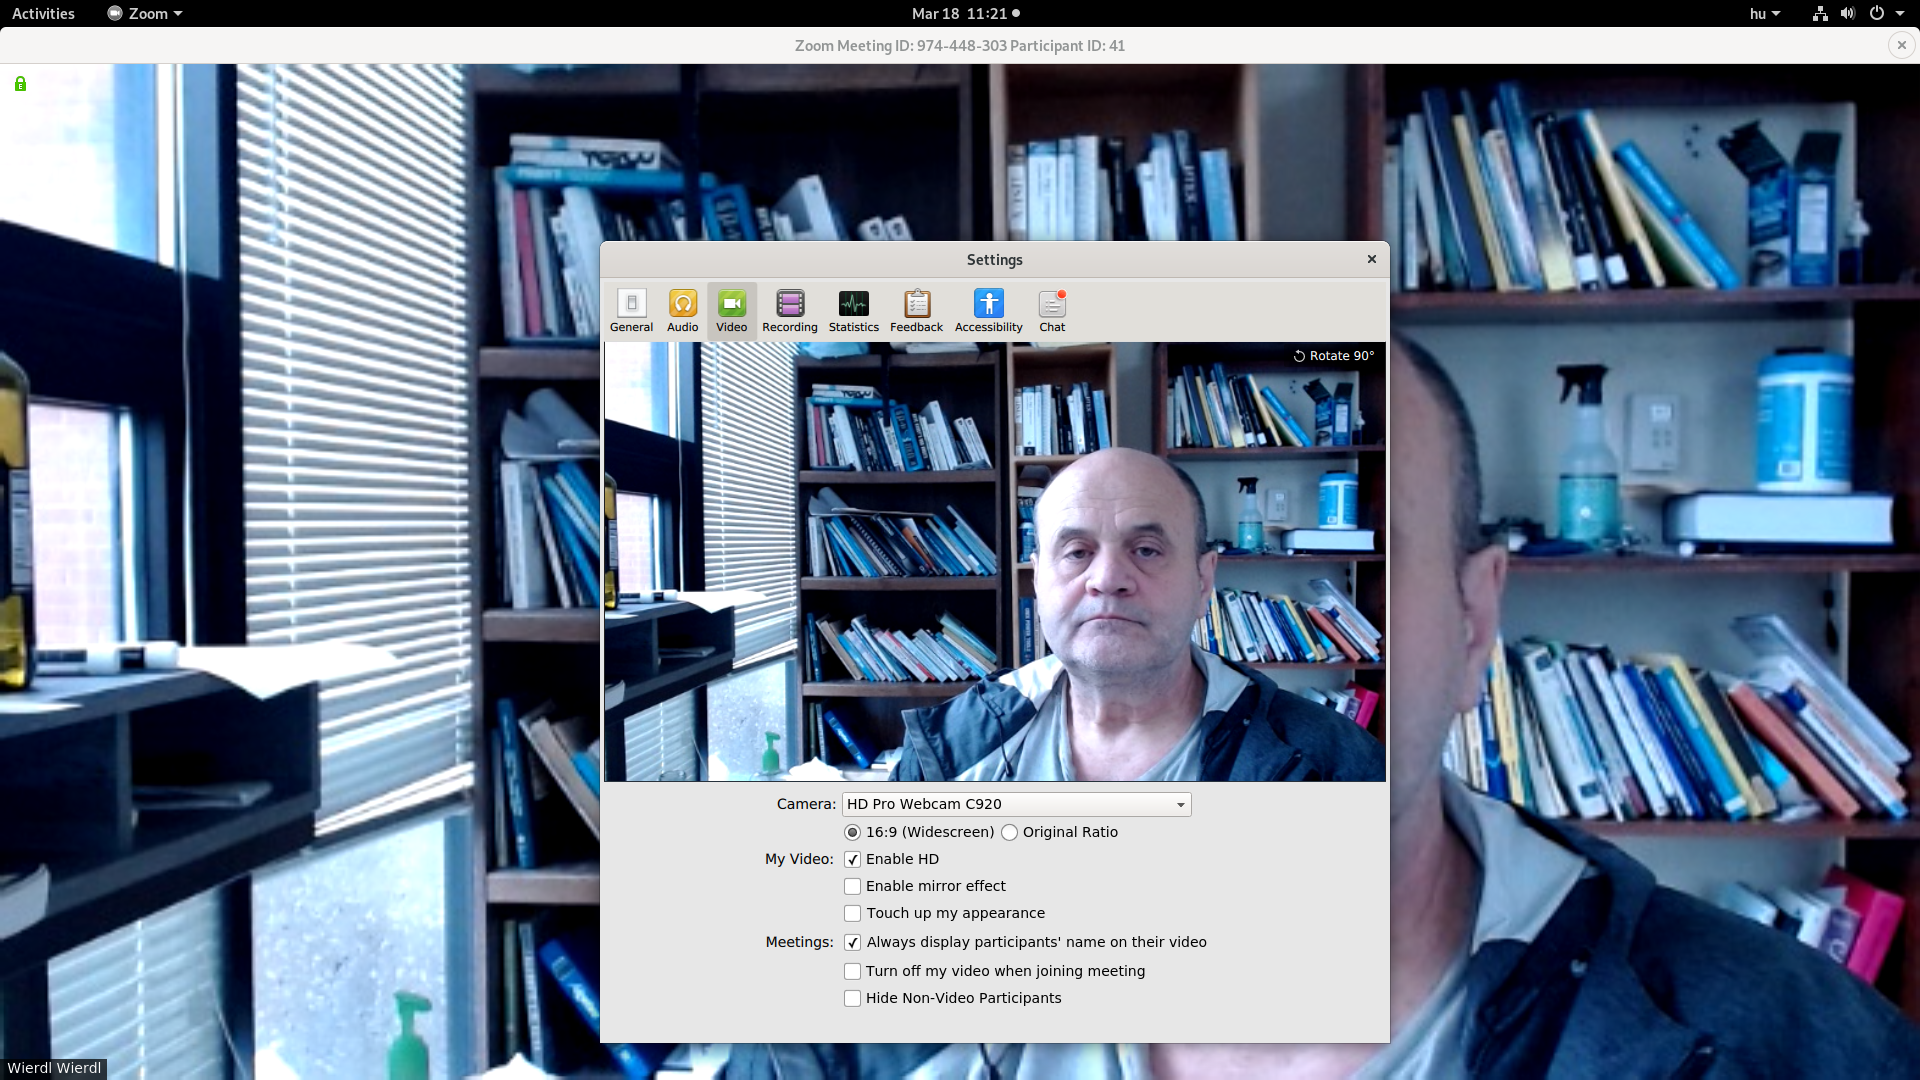
There are two items which are important here. One, that the Enable HD is checked, and two, that the Enable mirror effect is unchecked. Without the HD effect, the picture the students see may not be clear enough (this is why we bought high definition cameras for us to use), and the mirror effect is desirable only if you chat, but not for a lecture.
You also want to know, where zoom will save the recorded file on your computer. To see the location and perhaps configure it, you should click on the purple Recording icon. You will see
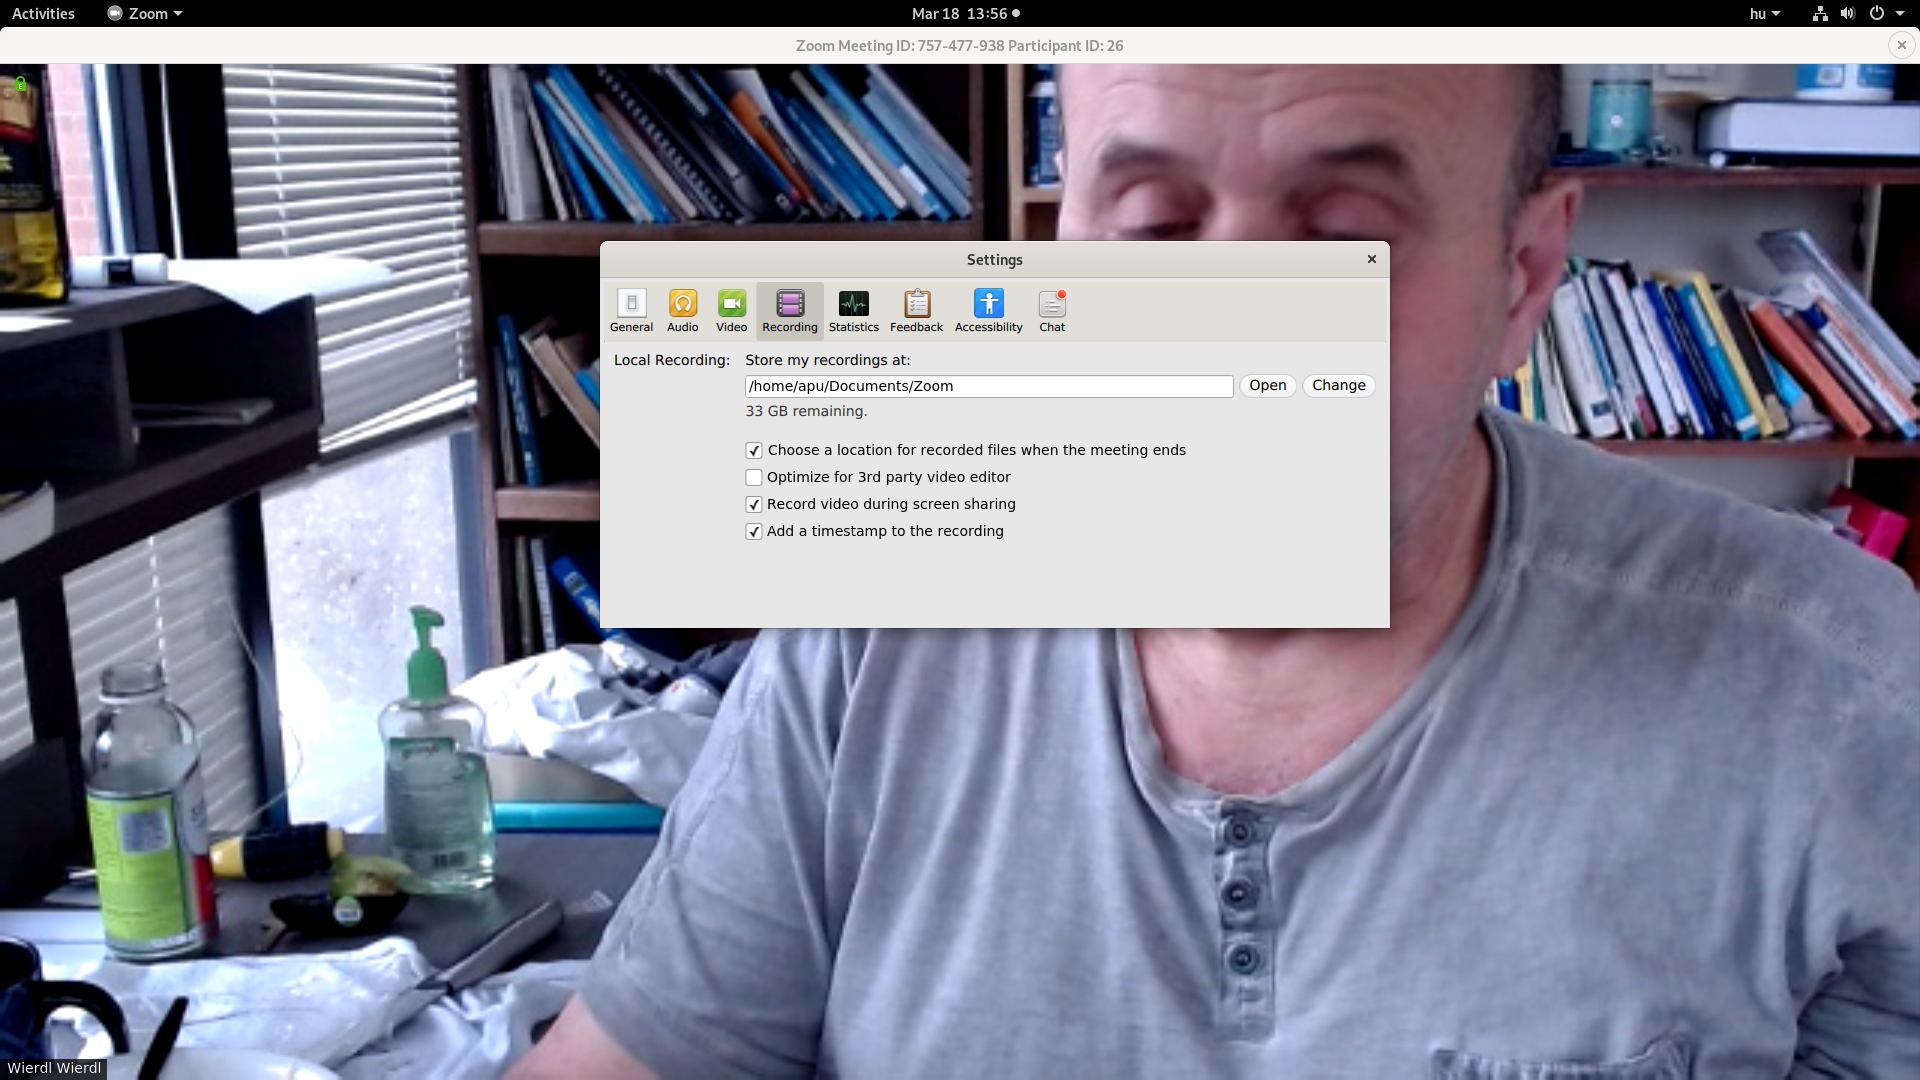
Zoom typically creates a Zoom subdirectory under your Documents directory and will put its files there. As you can see, I have checked two configuration boxes. One is the Choose a location for recorded files when the meeting ends, the other one is Add a timestamp to the recording. Checking both of these options will help you identify your recordings better, since you will have quite a few by the end of the semester.
Before starting a lecture, you want to start recording it. On the bottom of the Zoom screen, you can see the Record icon. When you click on it, you will have two options to select from. One is Record on this computer, meaning, the file containing the recording will be saved on your computer. This is the option you should choose. The other option Record to the Cloud does not work well, so forget it.
It is now my recommendation that you start a recording, talk a minute or so, then stop the recording. In the upper right hand corner you get a message in a pop-up window, saying, that when the meeting ends, the recorded file will be converted to a so called mp4 video format. So end the meeting by clicking on the red End Meeting text in the lower right hand corner. You will be prompted for what you want to do, the default being End meeting for all. Then Zoom will tell you that it is converting the recording, and this may take a few minutes after a one hour lecture. When the conversion to mp4 is done, Zoom will show you where it put the mp4 file. In my case, this is what I see
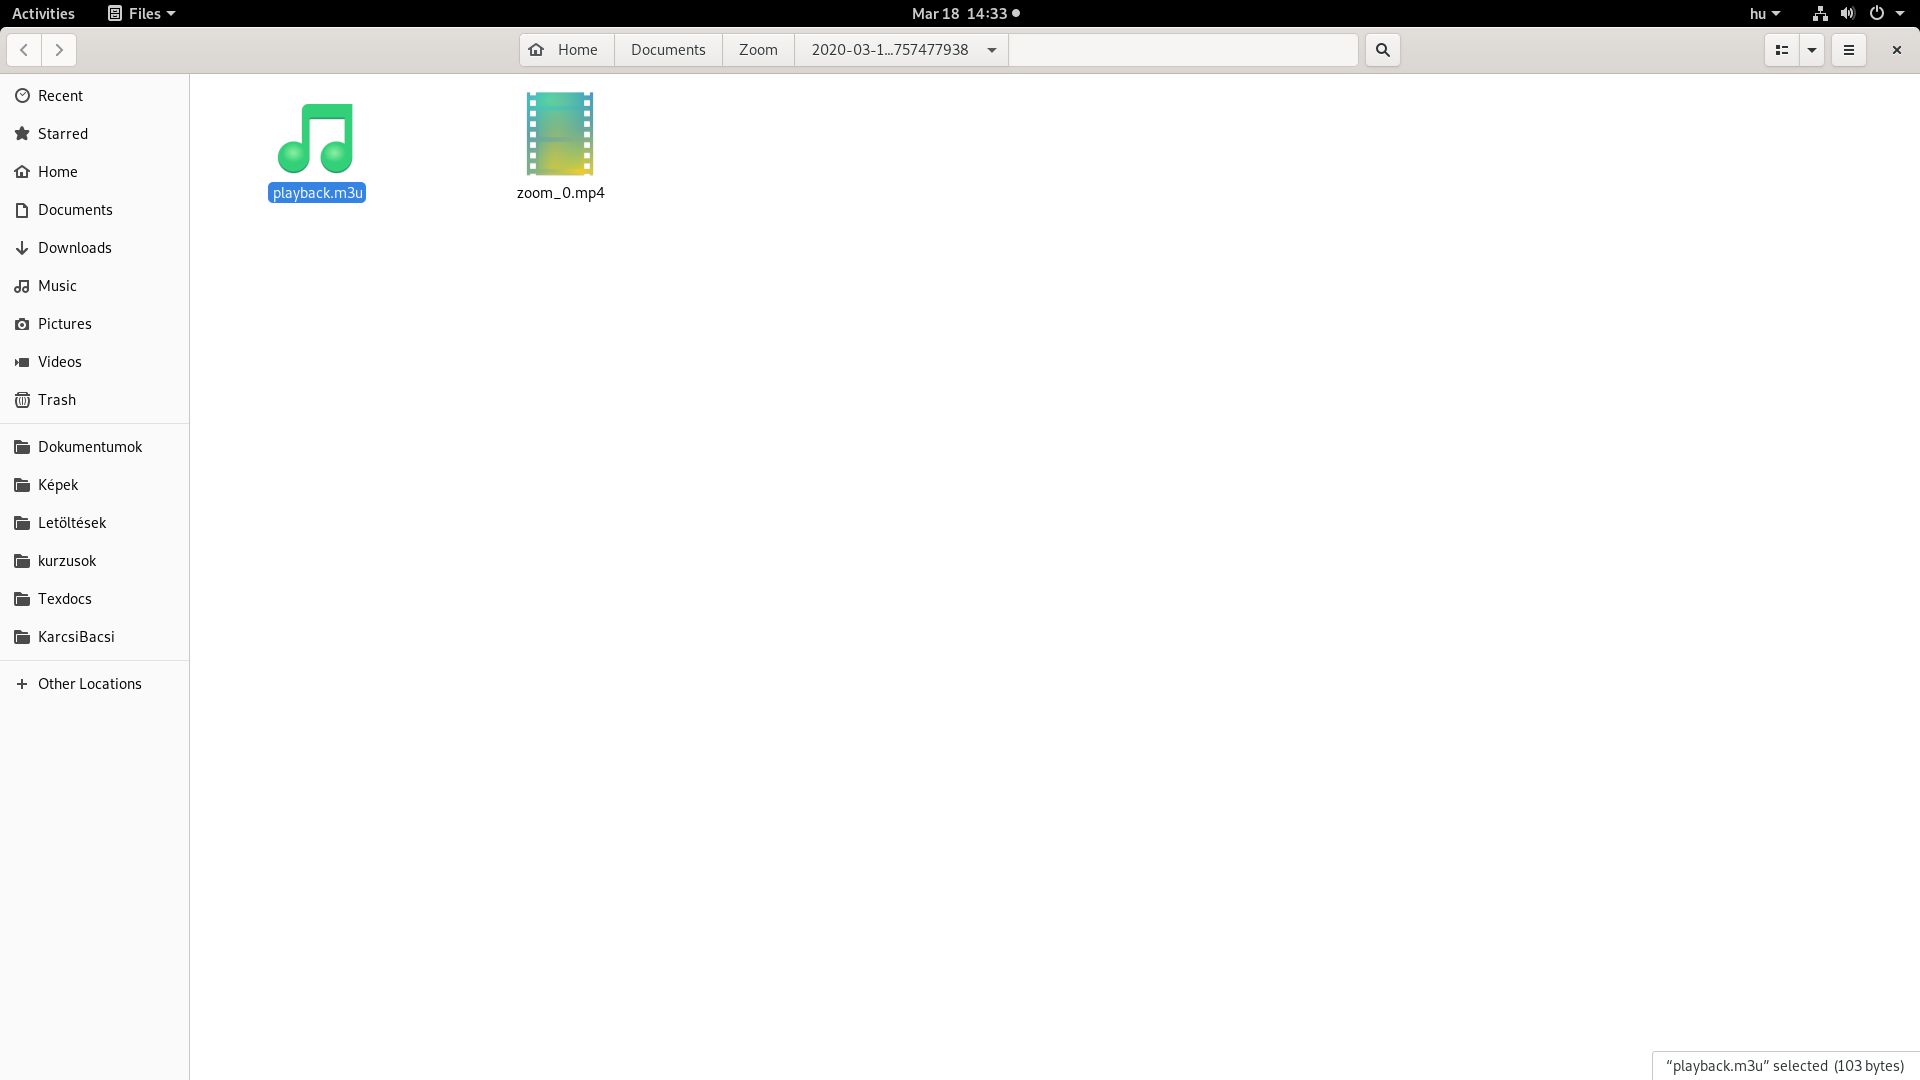
The file which was created is the zoom_0.mp4 file, and this is the file that needs to be made accessible for the students on the Internet. At this point, I recommend that you rename the file, and give it a unique name, or later you will run into a problem when uploading the file for sharing with the students. For example, a naming scheme that would include the course and section number and the date of the lecture would work well. A name like
zoom_7351_001_2020_03_19.mp4
correspond to this scheme.
To share the file with the students, we upload it to Onedrive, which is a storage space in the "cloud" (so not on your computer), and every one of us has 5 terabytes of space there. To access Onedrive, go to
and log in, using your UofM credentials. This time, you need to use your full UofM email address as username, so in my case, I enter mwierdl@memphis.edu.
After logging in, click on the OneDrive icon. In Onedrive, click on Upload and choose the Files option, and select the video file you recorded during the Zoom lecture. For example, I see this
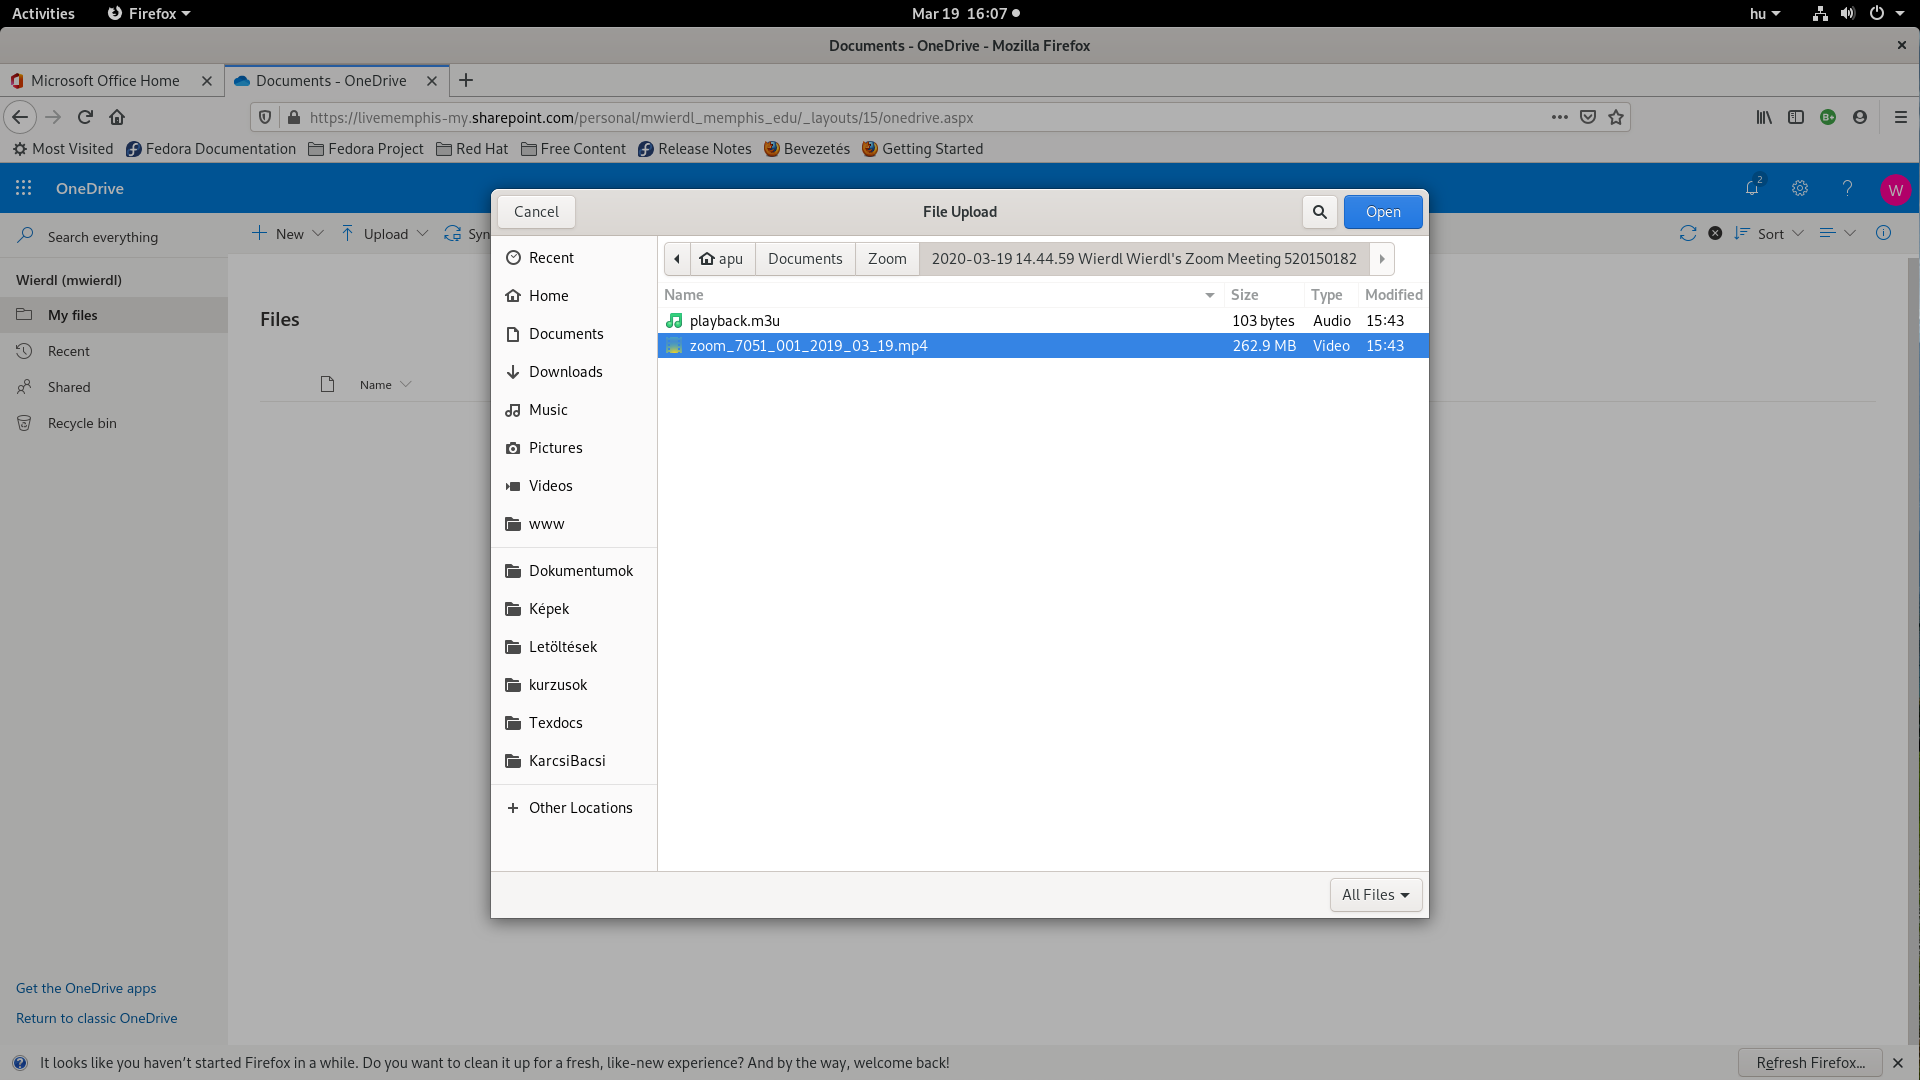
Once the file is uploaded to Onedrive, there is one more thing to do: you have to share the file with your students. Select the file you just uploaded by clicking in the beginning of its line, so you will see something like
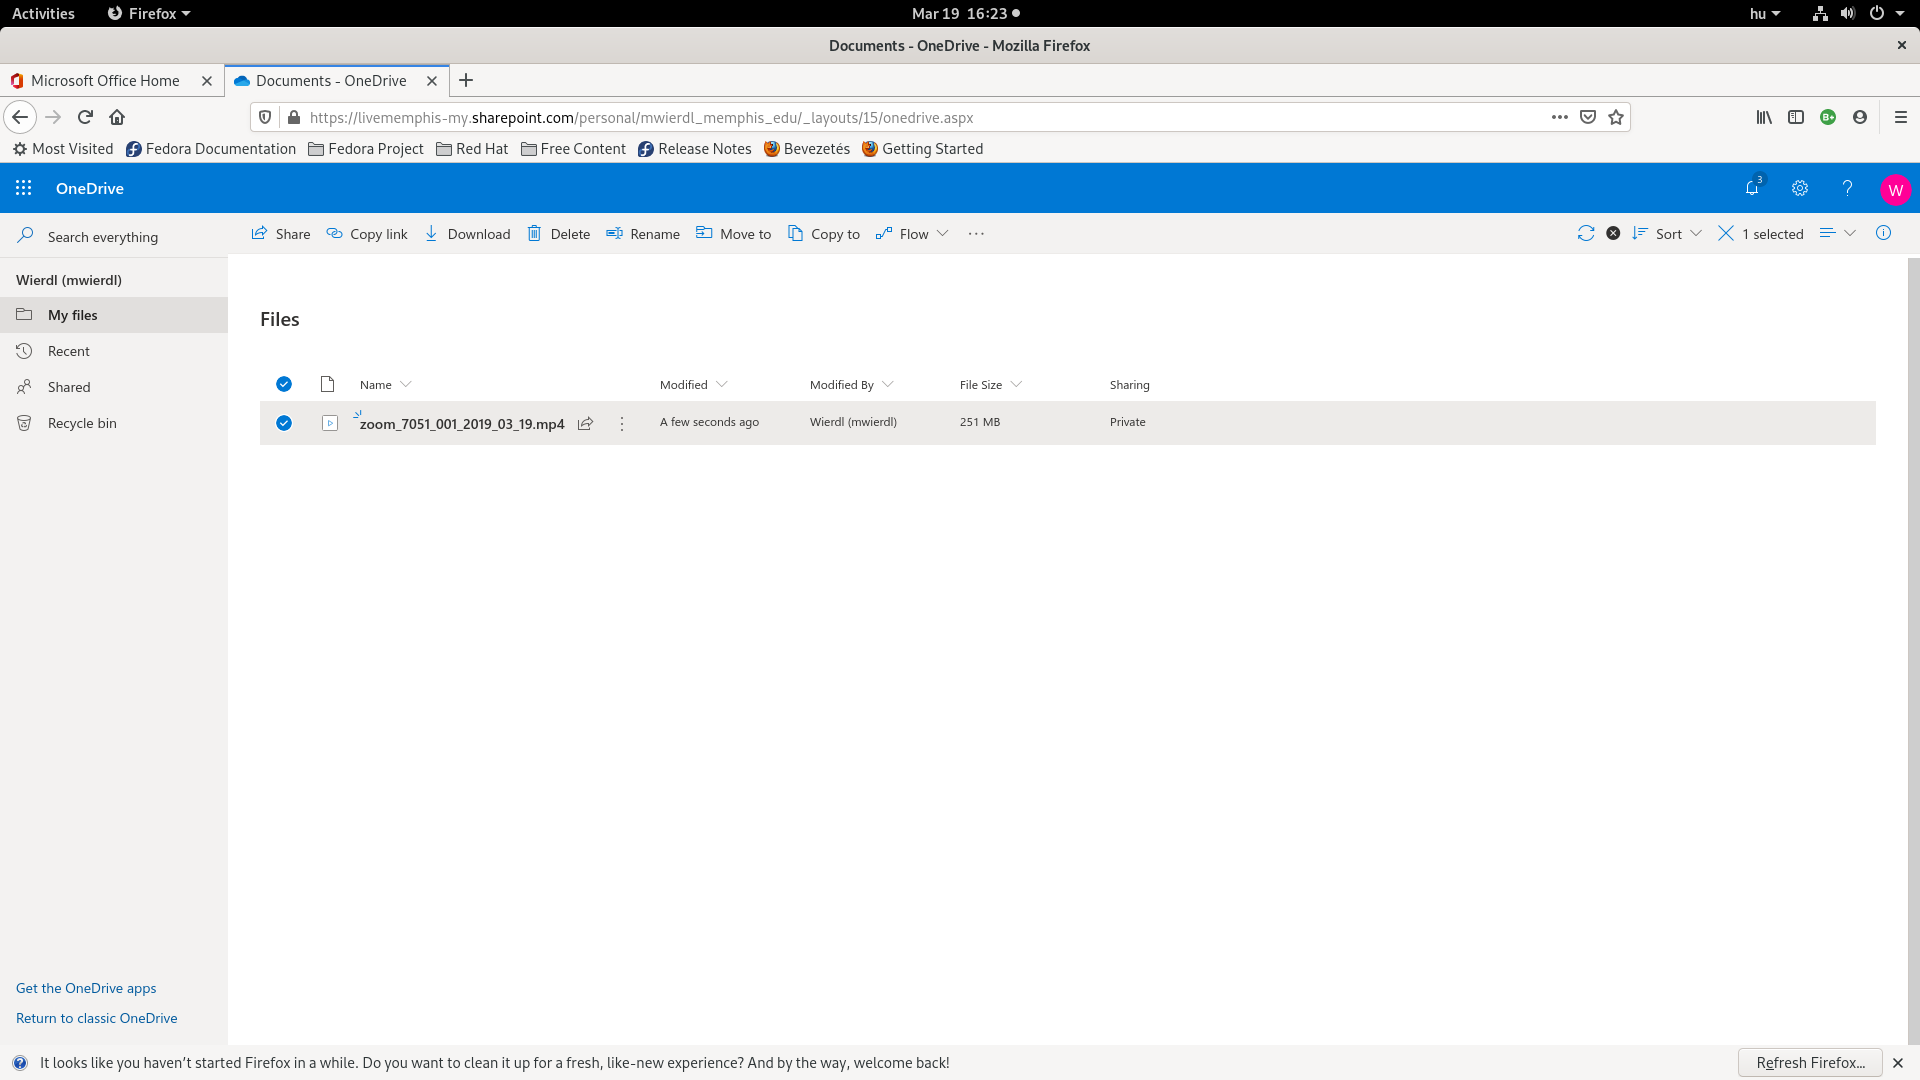
On the top, select Copy link. You will see a pop-up with the link you can send to the students.
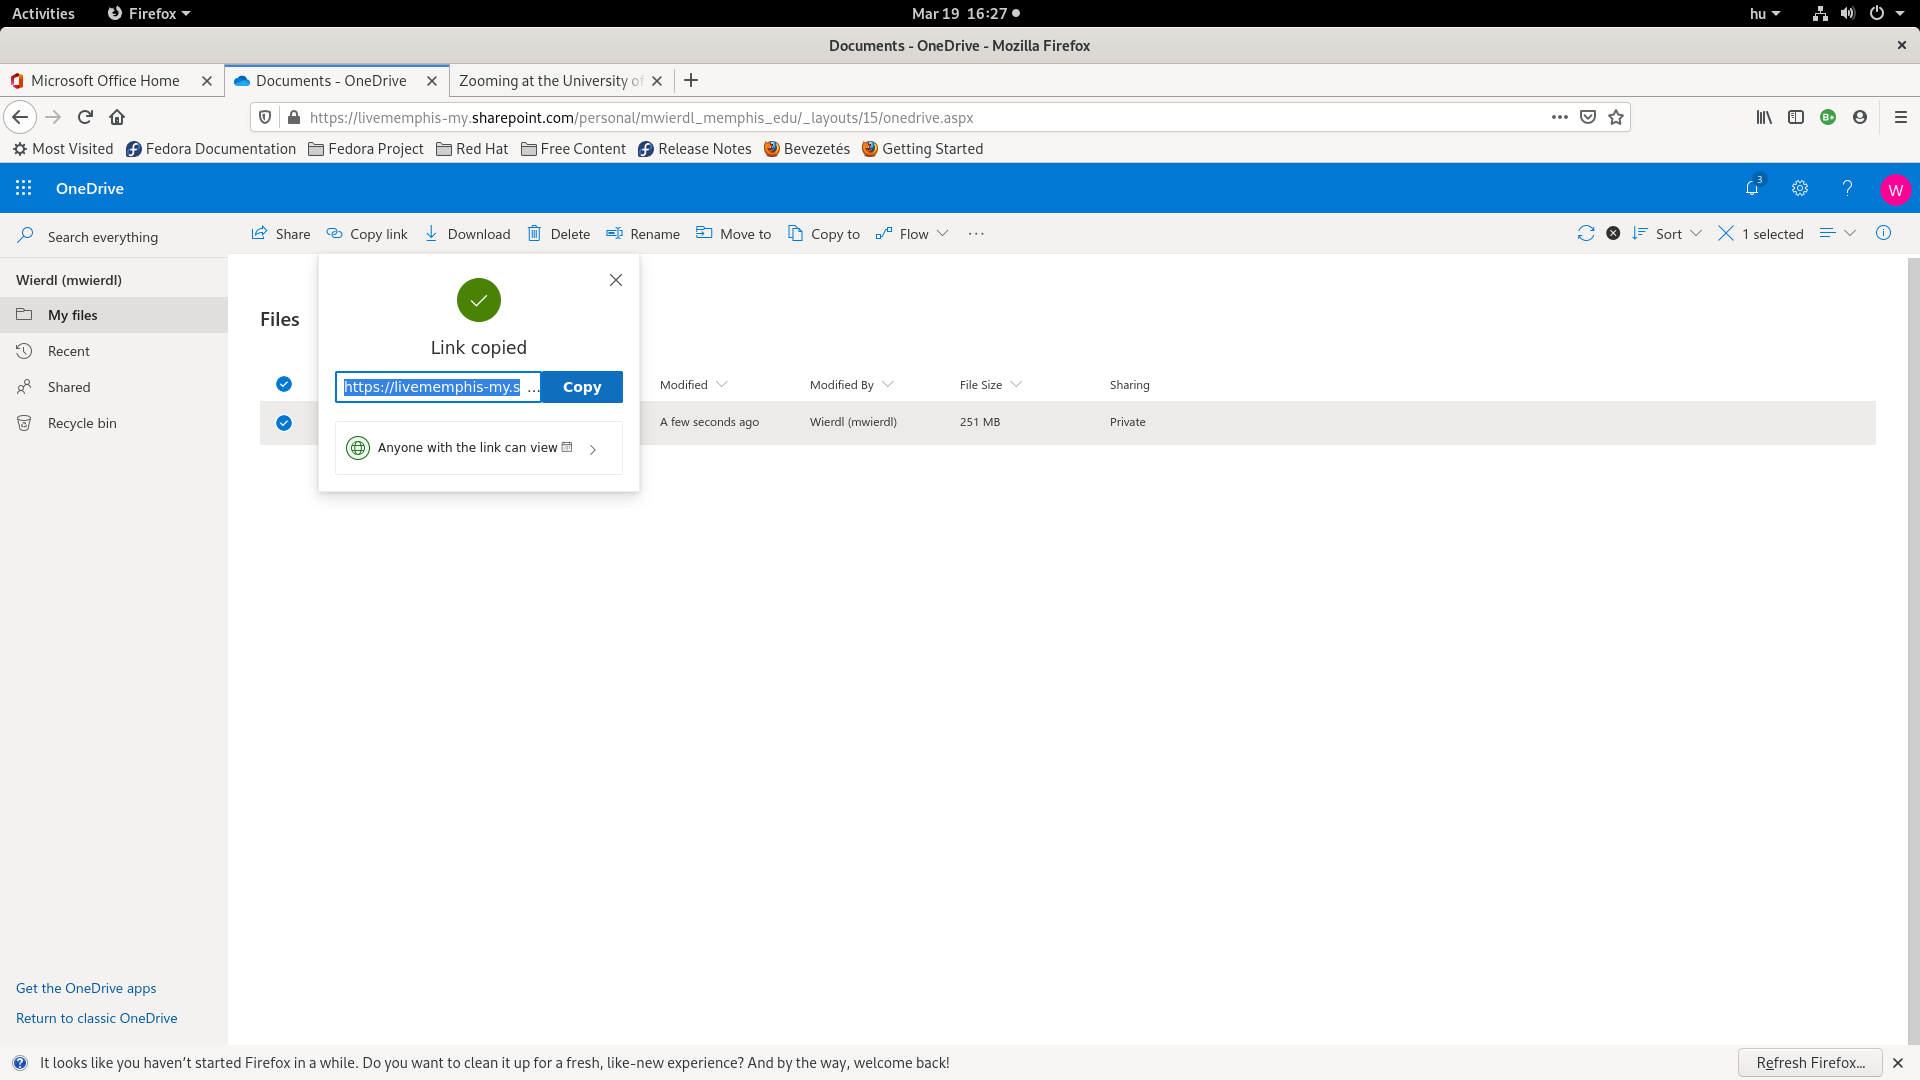
Note that I selected the option Anyone with the link can view which I think is the easiest option to manage. Once you copied the link (by clicking on the blue Copy button), send an email to your class with pasting the link into it. Here is what the link looks like. By clicking on it, you can see the video.
Scheduling a meeting
The remaining thing to figure out is how to schedule a class meeting with Zoom. To do this, go to (if you are not yet there)
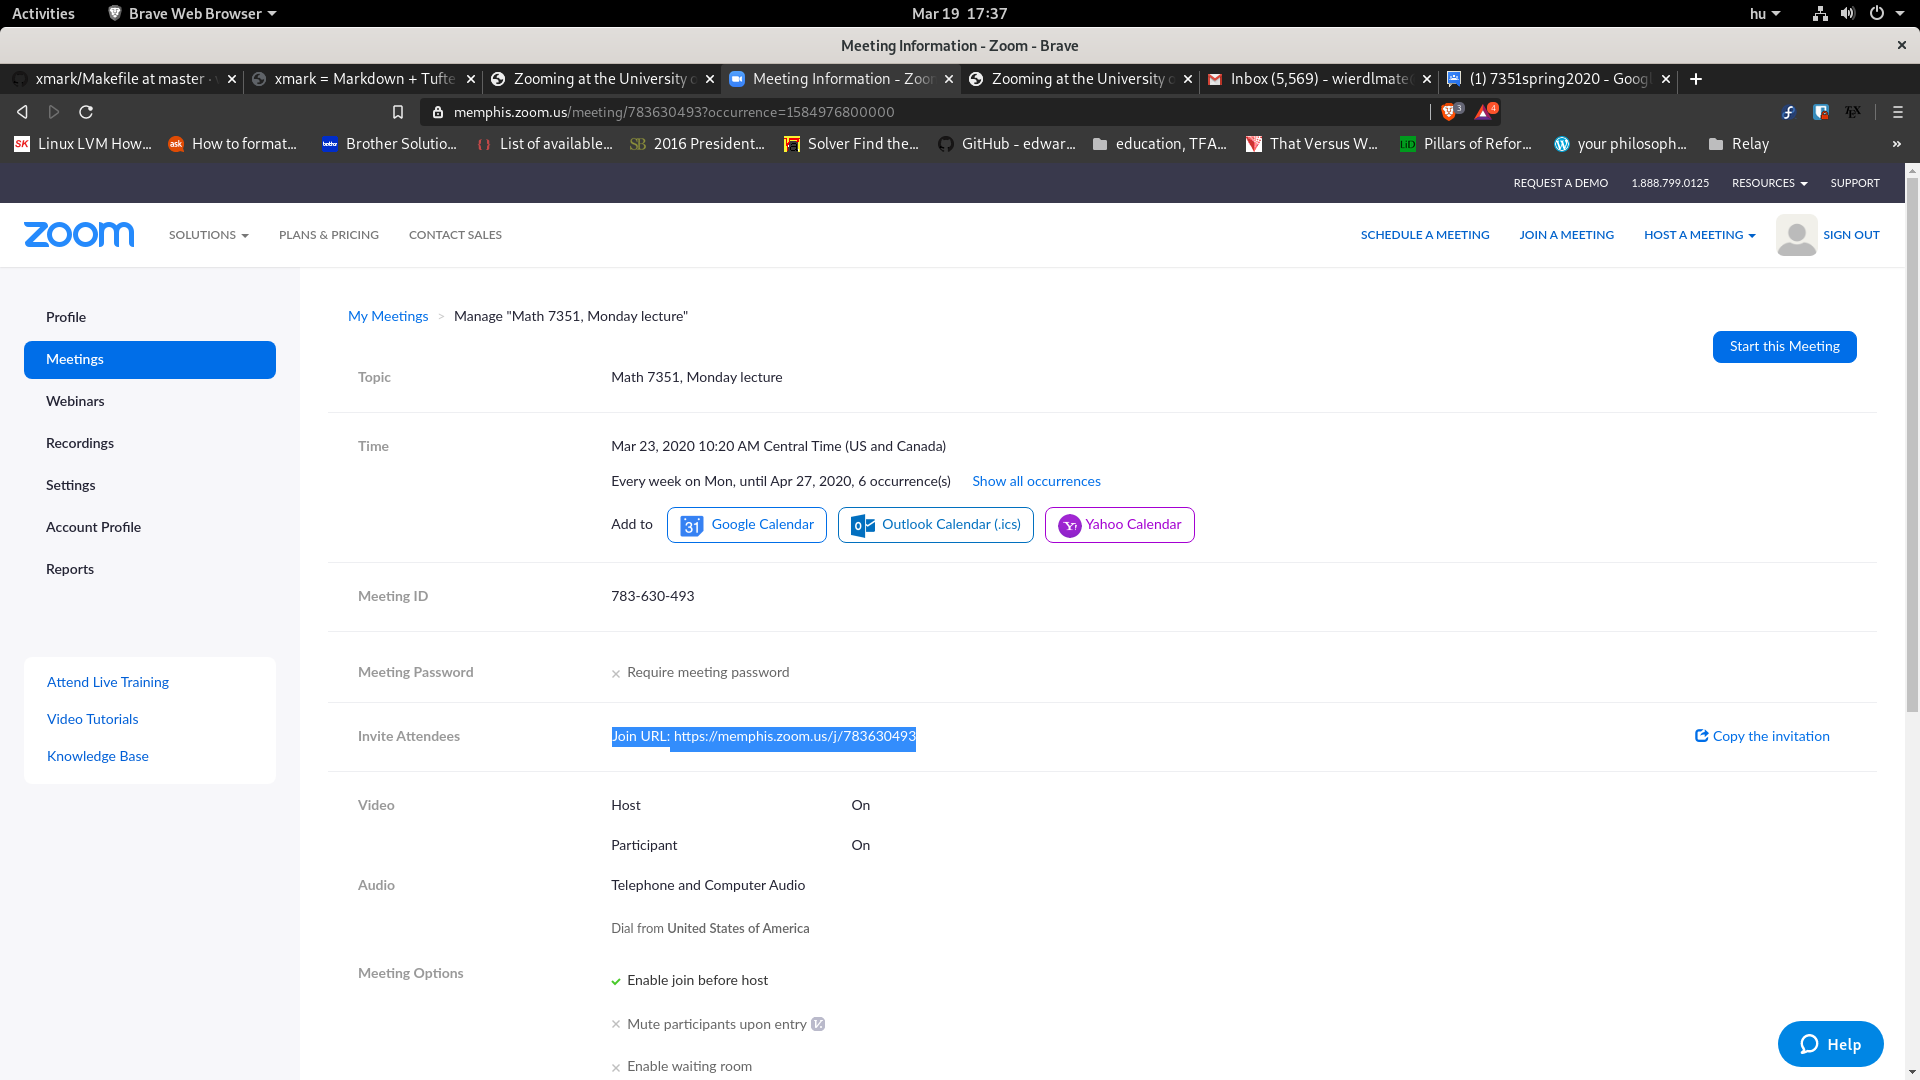
and click on Sign in. In the upper right area, select SCHEDULE A MEETING, and then fill out the form, and save it. After this, mine for Math 7351 looks like
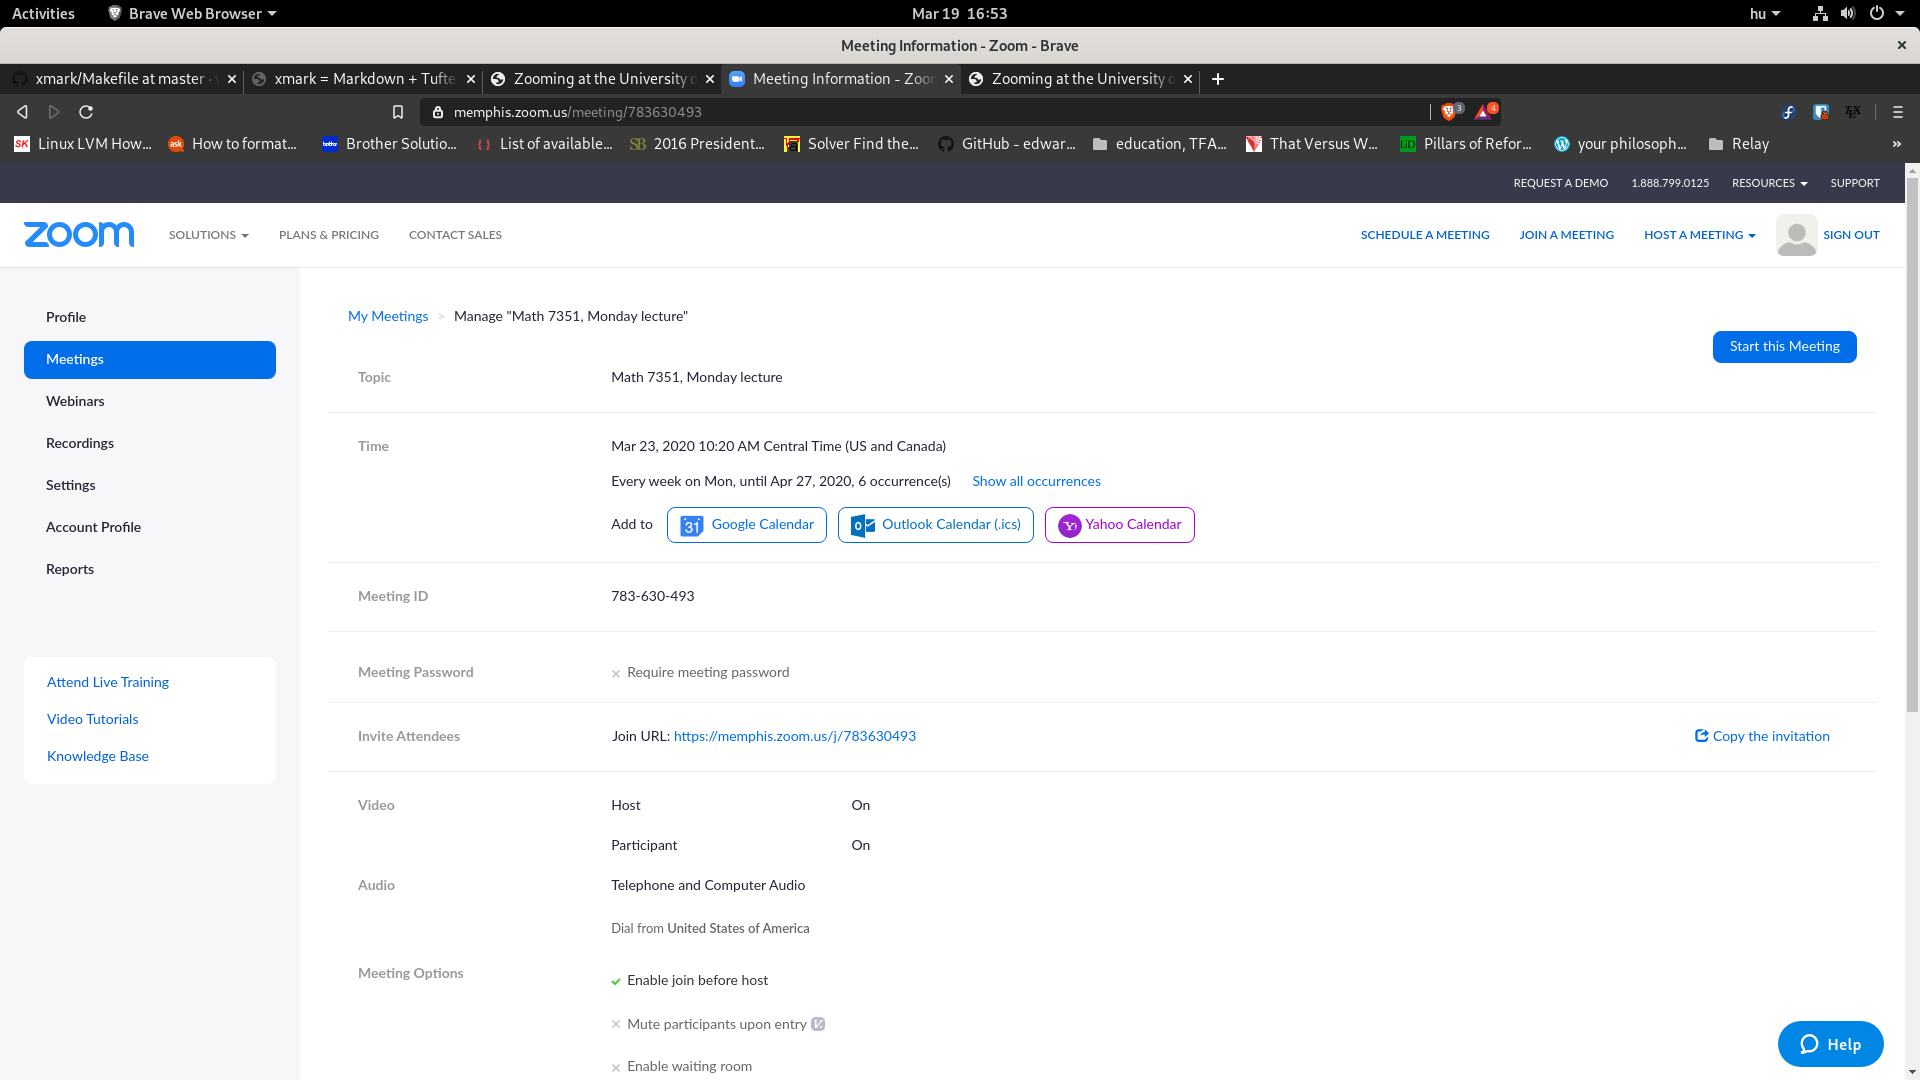
The final step is to send an invitation to the students about this meeting. To do that, you could just simply send the link appearing in the middle of the screen
Invite Attendees Join URL: https://memphis.zoom.us/...
IMO, this is the least confusing to students, but another possibility is to allow Zoom to make up an invitation template, which then you can email to the students, without the need for much explanation. To do that, click on Copy the invitation on the right. You'll get something similar to this
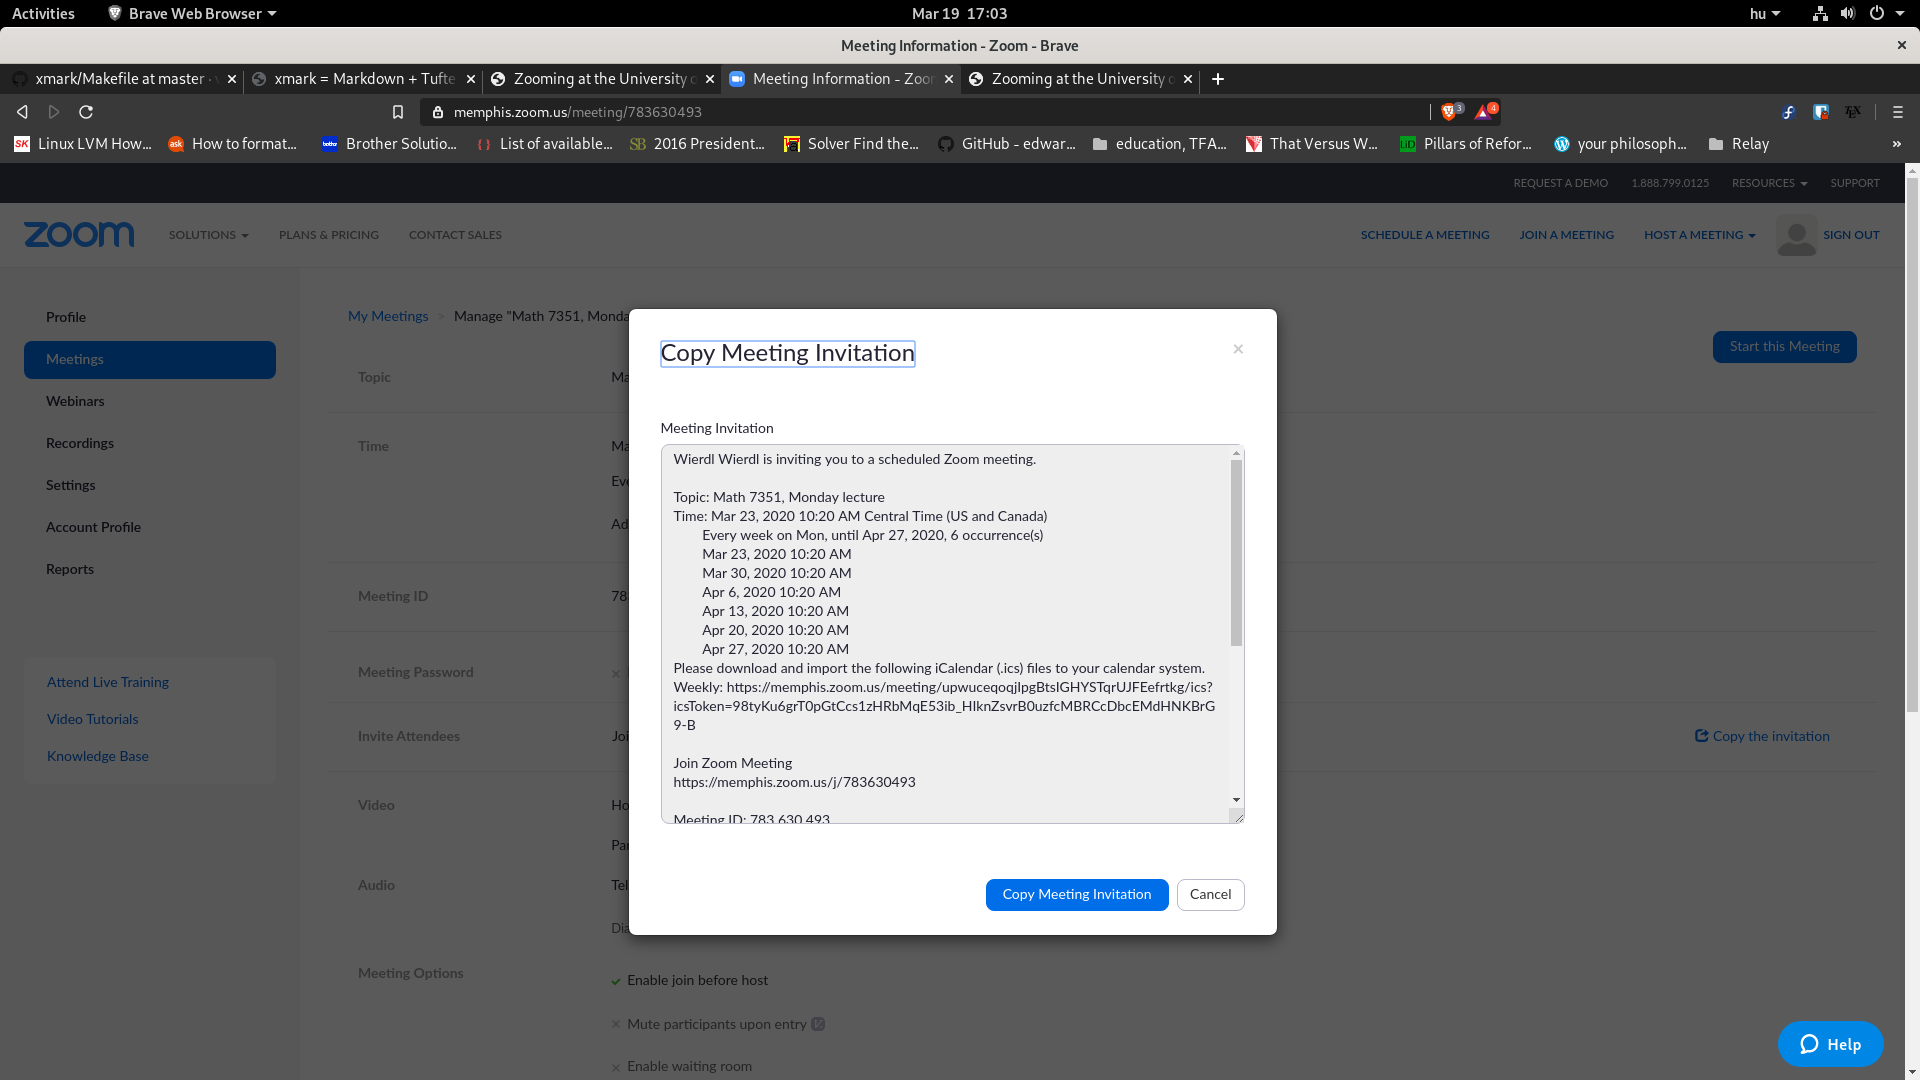
After clicking on the blue Copy Meeting Invitation, you just need to paste this invitation into an email to your class.
Start a scheduled class meeting
To start a class you previously scheduled, go to
and click on Sign in. On the left, click on Meetings. You will see something like this
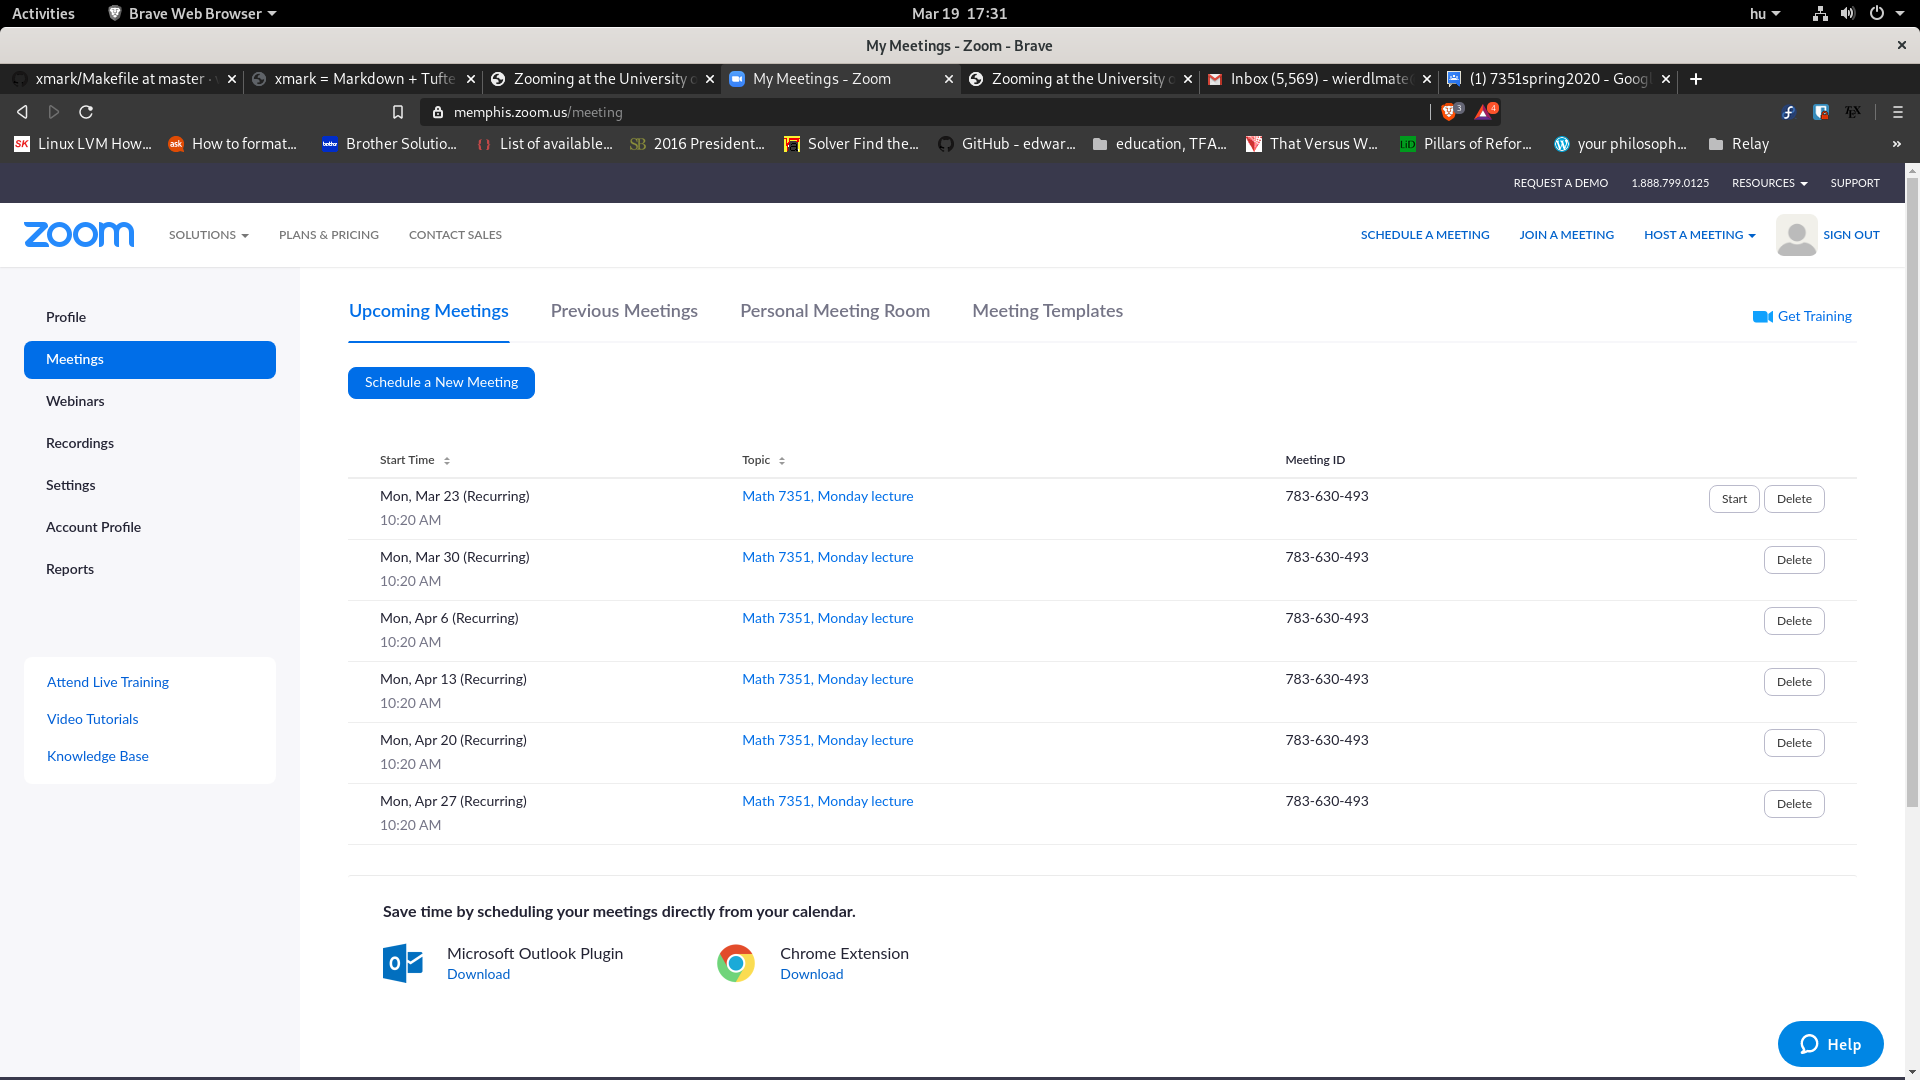
Clicking here on a meeting takes you to the Zoom page for the meeting, and there, if you want to start the class, click on the Join URL, which I highlighted with blue in the the middle of the screen.
